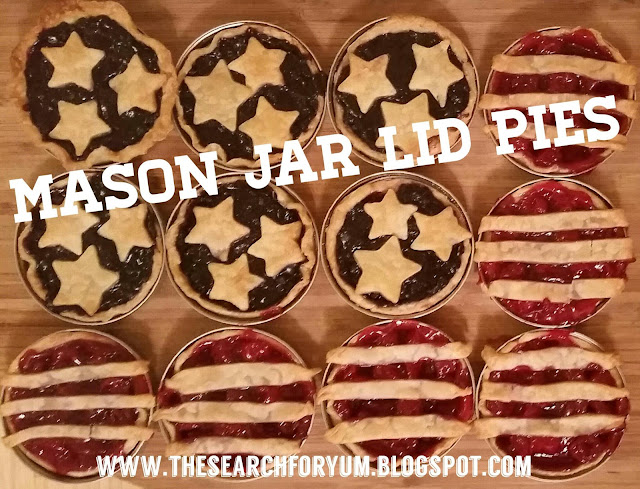
This is quite possibly the coolest thing I've ever made in the kitchen.
Just when I though Mason Jars couldn't get any cooler, these little mason jar lid pies started popping up on my Pinterest feed.
I could not wait to try this recipe but I wanted to have a special occasion to share these cute little pies for. Fourth of July BBQ was the perfect opportunity! And it helped with decorating decision.
I had never bought just mason jar lids separately and thought they would be pretty hard to find, but they had them right at Target and they were only about $4 for 12! Score!
Admittedly, I was a little intimidated by this recipe, every picture I came across looked so Pinterestly perfect I didn't think I would ever be able to pull it off. But I figured a Pinterest fail blog post would be just as fun so I set to research. I looked at every single Mason Jar Lid recipe I think was ever written. That's when I knew I had to put my phone down, digest everything I had learn and just set about doing this my own way. I'm so glad I did because these turned out great and it was seriously one of the easiest recipes ever. Not to mention SO much fun to make! And you only need THREE things to make these cute little mason jar lid pies. I'm obsessed.
Mason Jar Lid Pies Recipe
What You'll Need:
- Pie Crust - the type you roll out
- Can of Pie Filling of our choice
- Mason Jar Lids
How You'll Do It:
1. Turn the Mason Jar Lid insert upside down so the metal side is facing up (opposite of how you would normally keep the lid together. Pic below)
2. Roll out pie crust.
3. Cut out a circle of pie crust that is slightly larger than the big part of the lid - this way the crust will form sides. I found that one of my large mouth coffee mugs was just right!
4. Center the cut out circles into the Mason Jar lid.
Repeat steps 3 and 4 until all jar lids are done!
5. Fill with pie filling.
6. Decorate the top however you would like with remaining pie crust. I found this crust was really easy to work with and ended up balling it up and re-rolling it out several times....kind of reminded of making sugar cookies!
7. Bake in the oven at 375 for about 15 to 20 minutes or until you see the crust has browned nicely and the pie filling is bubbling.
8. Remove and let cool. Enjoy!
Step by step pictures below for all of you visual learners!
Step 1: Turn the Mason Jar Lid insert upside down so the metal side is facing up (opposite of how you would normally keep the lid together. Pic below)
Step 2: Roll out pie crust.
Step 3: Cut out a circle of pie crust that is slightly larger than the big part of the lid - this way the crust will form sides. I found that one of my large mouth coffee mugs was just right!
Step 4: Center the cut out circles into the Mason Jar lid.
Step 5: Fill with pie filling.
Step 6 - 7:
Decorate the top however you would like with remaining pie crust. I found this crust was really easy to work with and ended up balling it up and re-rolling it out several times....kind of reminded of making sugar cookies!
Bake in the oven at 375 for about 15 to 20 minutes or until you see the crust has browned nicely and the pie filling is bubbling.
Last but not least:
Remove and let cool. Enjoy!
I was pretty excited that these Mason Jar Lid Pies are pretty easy to store once made as mine could be easily stacked on top of one another. Just a little added bonus for bringing to a BBQ!
I would love to see your Mason Jar Lid Pies! Feel free to share in the comments.


Comments
Post a Comment